NIO和BIO的区别总结
1. 表格说明两者的区别
| IO类型 | 是否阻塞 | 同步IO | 线程模型 |
|---|---|---|---|
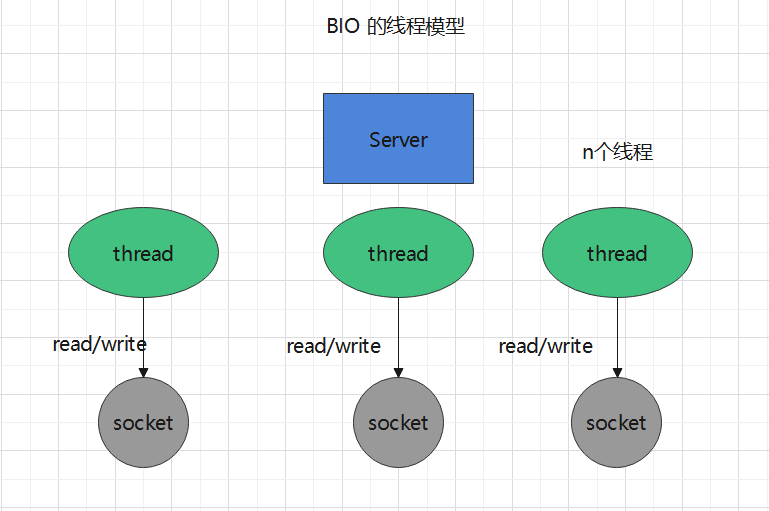
| BIO | 阻塞 | 是 | 一个线程对应一个请求 |
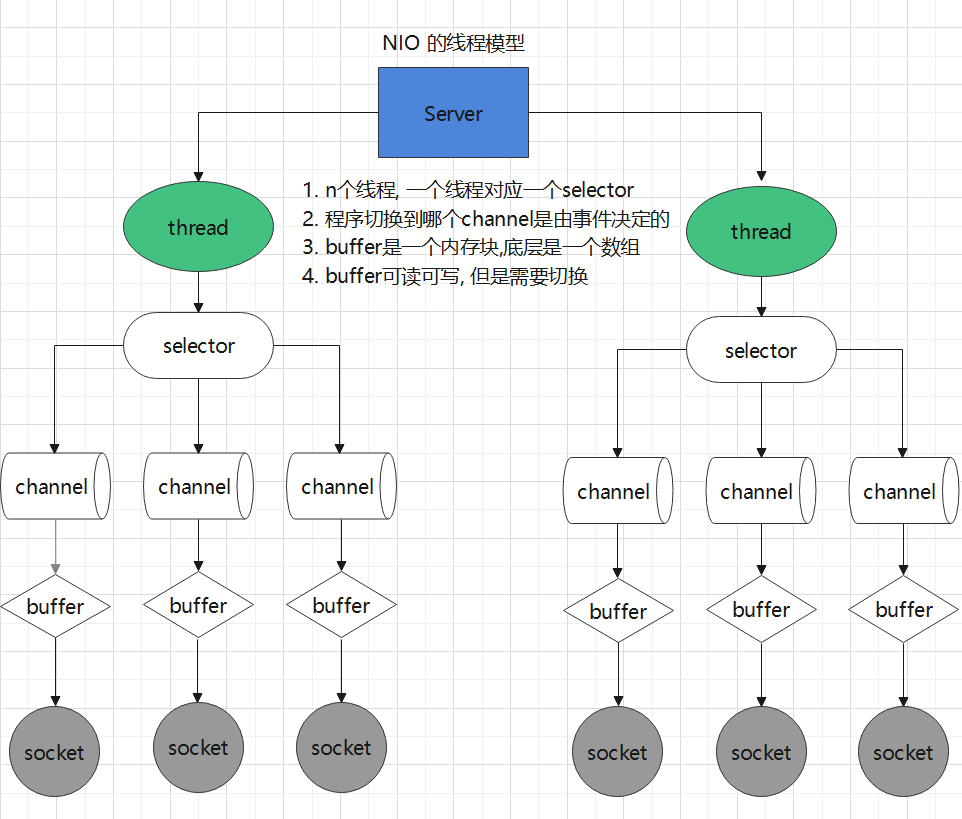
| NIO | 非阻塞 | 是 | 一个线程可以处理多个请求 |
2. 示意图说明区别


代码实战
1. BIO实战
1.1 编写BIO代码
目的: 实现一个server, 接受客户端发送来的消息, 并将消息返回给客户端
思路:
- 首先创建一个ServerSocket , 并且绑定一个本地端口9999,
- 等待客户端连接, 然后将连接交给线程池处理
- 从inputStream 里面读取内容, 并且将内容使用outPutStream返回给客户端
import java.io.IOException;
import java.io.InputStream;
import java.io.OutputStream;
import java.net.InetSocketAddress;
import java.net.ServerSocket;
import java.net.Socket;
import java.util.concurrent.ExecutorService;
import java.util.concurrent.Executors;

public class BioServerTest {
    public static void main(String[] args) throws IOException {

        // 固定10个线程,并且创建给一个serverSocket,并且绑定端口
        ExecutorService executorService = Executors.newFixedThreadPool(14);
        ServerSocket serverSocket = new ServerSocket();
        serverSocket.bind(new InetSocketAddress(9999));

        // 接受客户端的请求, 并将客户端发送来的文字, 返回给客户端
        while (true) {
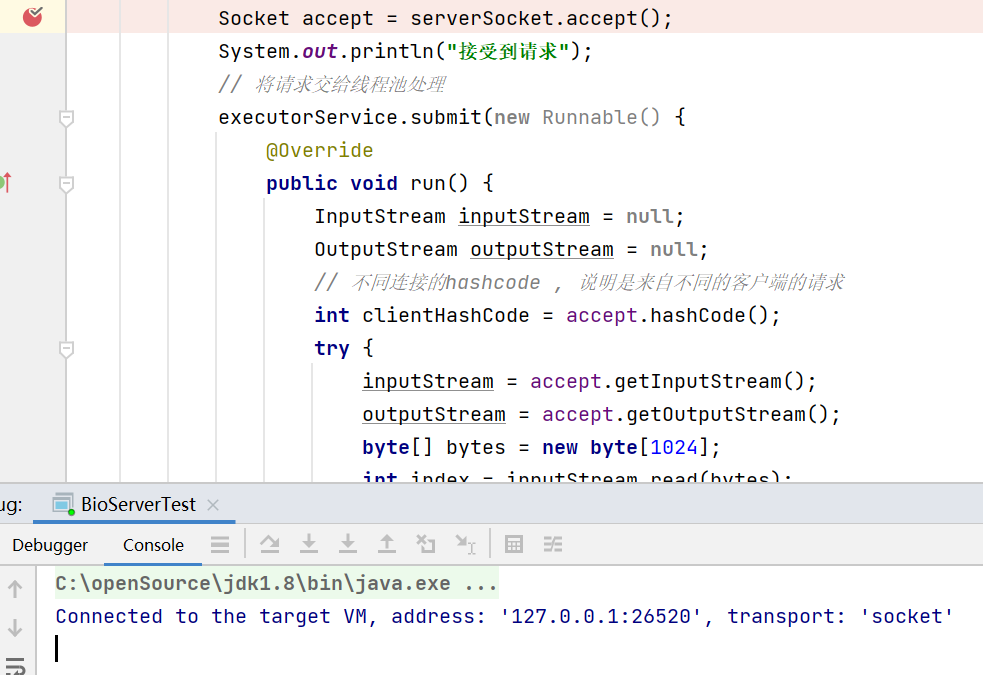
            // 等待其它客户端的请求, 记住这里阻塞的,  当我们启动该程序, 这里的accept 会阻塞不动, 直到成功接收一个请求
            Socket accept = serverSocket.accept();
            System.out.println("接受到请求");
            // 将请求交给线程池处理
            executorService.submit(new Runnable() {
                @Override
                public void run() {
                    InputStream inputStream = null;
                    OutputStream outputStream = null;
                    // 不同连接的hashcode , 说明是来自不同的客户端的请求
                    int clientHashCode = accept.hashCode();
                    try {
                        inputStream = accept.getInputStream();
                        outputStream = accept.getOutputStream();
                        byte[] bytes = new byte[1024];
                        int index = inputStream.read(bytes);
                        String s = new String(bytes, 0, index);
                        System.out.println("客户端:" + clientHashCode + ",发送来的消息是:" + s);
                        outputStream.write(("server回复: " + s).getBytes());
                    } catch (IOException e) {
                        e.printStackTrace();
                    } finally {
                        try {
                            accept.close();
                        } catch (IOException e) {
                            e.printStackTrace();
                        }
                    }
                }
            });
        }

    }
}
1.2 启动程序

1.3 在命令行中连接客户端, 观察结果

输入hello world ,期待结果返回hello world

idea 服务端的console 如下

2. NIO实战
目的: 通过NIO 实现client和server的交互
思路:
Server 端思路
首先创建socketServerChannel,和Selctor, 将channel 注册selector 上面去
等待客户端连接, 将客户端连接的channel注册到selctor上面去, 注意不同的channel有不同的事件
获取获取客户端channel拿到数据
Client 端思路
- 创建SocketChannel, 然后连接Server端
- 当连接完成后, 向Server端发送消息
2.1 编写NIO代码
2.2.1 Server端代码
import java.io.IOException;
import java.net.InetSocketAddress;
import java.nio.ByteBuffer;
import java.nio.channels.SelectionKey;
import java.nio.channels.Selector;
import java.nio.channels.ServerSocketChannel;
import java.nio.channels.SocketChannel;
import java.util.Iterator;

public class NIOServerDemo {
    public static void main(String[] args) throws IOException {
        ServerSocketChannel serverSocketChannel = ServerSocketChannel.open();
        serverSocketChannel.configureBlocking(false);
        Selector selector = Selector.open();
        serverSocketChannel.bind(new InetSocketAddress(9999));
        // 将serverSocketChannel的可接受事件注册到selector上面,
        serverSocketChannel.register(selector, SelectionKey.OP_ACCEPT);
        while (true) {
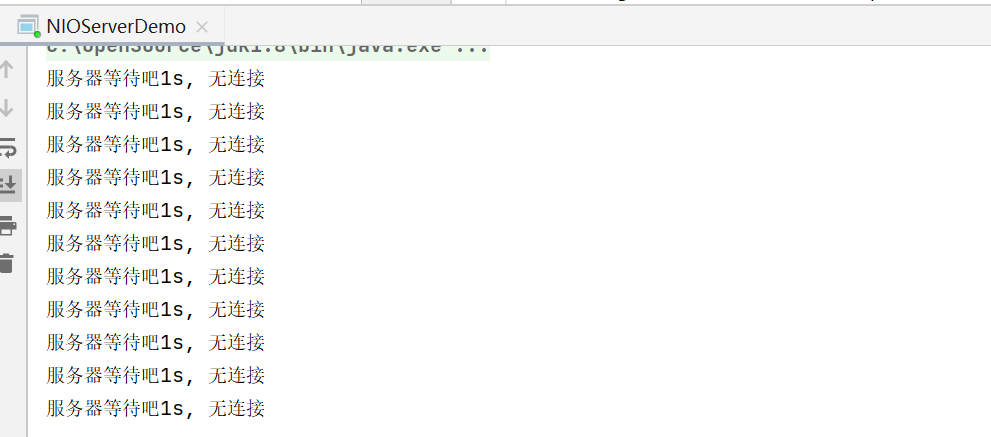
            int resultCode = selector.select(1000);
            if (resultCode == 0) {
                System.out.println("服务器等待吧1s, 无连接");
                continue;
            }
            Iterator<SelectionKey> iterator = selector.selectedKeys().iterator();
            while (iterator.hasNext()) {
                try {
                    SelectionKey selectionKey = iterator.next();
                    // 当前事件是否可接受
                    if (selectionKey.isAcceptable()) {
                        System.out.println("client 连接成功" + serverSocketChannel.hashCode());
                        // 拿到接受的socketChannel,将客户端channel的read事件注册到selector上面去
                        SocketChannel socketChannel = serverSocketChannel.accept();
                        socketChannel.configureBlocking(false);
                        socketChannel.register(selector, SelectionKey.OP_READ, ByteBuffer.allocate(1024));
                    }
                    // 当前事件是否是可读事件
                    if (selectionKey.isReadable()) {
                        // 从channel拿到消息, 并且读取出来
                        SocketChannel channel = (SocketChannel) selectionKey.channel();
                        ByteBuffer attachment = (ByteBuffer) selectionKey.attachment();
                        channel.read(attachment);
                        System.out.println("受到客户端信息:" + new String(attachment.array()));
                    }
                } catch (Exception e) {
                    System.out.println(e);
                } finally {
                    // 最好别忘了移出key
                    iterator.remove();
                }
            }
        }
    }
}
2.2.2 Client端代码
import java.net.InetSocketAddress;
import java.nio.ByteBuffer;
import java.nio.channels.SocketChannel;
import java.nio.charset.StandardCharsets;

/**
 * socket clilent 连接server
 */
public class NIOClientDemo {
    public static void main(String[] args) throws Exception {

        // 创建SocketChannel, 并且连接本地9999 端口
        SocketChannel socketChannel = SocketChannel.open();
        InetSocketAddress inetSocketAddress = new InetSocketAddress("192.168.31.31", 9999);
        socketChannel.configureBlocking(false);
        if (!socketChannel.connect(inetSocketAddress)) {
            while (!socketChannel.finishConnect()) {
                System.out.println("连接需要时间");
            }
        }
        System.out.println("连接server成功");
        // 发server端发送消息
        String str = "hello world";
        ByteBuffer wrap = ByteBuffer.wrap(str.getBytes(StandardCharsets.UTF_8));
        int write = socketChannel.write(wrap);
        // 挂起程序
        System.in.read();
    }
}
2.2 启动程序
启动Server

启动Client

2.3 控制台观察结果
期望Server端收到 Client 端的消息

总结
- 通过编写BIO 和NIO的代码可以得出, BIO是每个线程处理一个请求, 但是NIO可以一个线程处理多个请求。NIO是通过将selector的事件注册到channel上面, 然后轮询对应的key,处理不同的事件. 一个连接使用一个select线程就解决了。
- 在高并发的情况下面,1000个连接需要1000个线程才能连接。而BIO 一般情况下面使用 (2* cpu核)+2即可,这是因为NIO 是非阻塞的,不必等待 io阻塞,只有当写事件来的时候才会处理。显然NIO在使用少数线程的情况下对CPU时间片竞争较小,同时内存的占用也较小,随着社区的Wubflux的推进,在全异步的情况下面 Webflux能够充分利用多核CPU处理事件,提升并发量和吞吐量。在接口耗时固定IO时间固定的情况下,NIO虽然不能提升接口响应速度,但BIO的竞争相对来说更加激烈,接口耗时波动幅度很大, NIO的处理时间相对来说更加平稳,并且吞吐量是远远优于BIO。这也是为什么社区越来越推荐Webflux的原因。也可以参考我先前做过的一次压力测试。
